Getting Started
This guide will walk you through installing Agentic, setting up your first agent, and understanding how it works.
Prerequisites
Note: Agentic requires Python 3.12. It does not work with Python 3.13+ due to Ray compatibility issues.
Before you begin, ensure you have the following:
- Python 3.12
uv- a Python package manager (installation instructions)node&npmOptional - used for building the frontend dashboard (installation instructions)gitOptional - used for cloning from source (installation instructions)
Installation & Setup
1. Set up a project directory
Set up a directory to hold your agentic project, and create a virtual environment using uv:
mkdir -p ~/agentic
cd ~/agentic
uv venv --python 3.12
source .venv/bin/activate
2. Install Agentic
To install Agentic you can either install from source or from PyPI.
Note: In this guide we'll install the
allextra which includes all tools and features. To customize your installation, see the pyproject.toml for a list of all available extras.If you're on Linux or Windows you will need to add
--extra-index-url https://download.pytorch.org/whl/cputo install the CPU version of PyTorch.
| Source | PyPI |
|---|---|
|
|
3. Initialize Agentic
Initialize Agentic in your project directory:
agentic init .
The initialization will copy examples and a basic file structure into the directory agents.
.
├── agents                  # Your agents
├── examples                # Example agents made by us
│   ├── __init__.py
│   ├── agentic_oracle.py
│   ├── ...                 # Other examples
│   └── tool_builder.py
├── runtime                 # Runtime data (cli history, run logs, etc)
├── tests                   # Space to put your tests
└── tools                   # Space to put custom tools
4. Configure Secrets
Agentic stores settings and secrets in a sqlite database on your machine. The file is located at ~/.agentic/agentsdb.
To run agents you'll need at least one llm api key configured. Go to our models page for a list of supported models. You can set api keys using the agentic secrets command:
agentic secrets set OPENAI_API_KEY=...
Note: You can also optionally create a
.envfile in the root of your project directory to store your secrets.
Creating Your First Agent
Let's build our first agent - a simple weather reporting agent.
Create a new file ./agents/weather.py, and add this code:
from agentic.common import Agent, AgentRunner
from agentic.tools import WeatherTool

weather_agent = Agent(
    name="Weather Agent",
    welcome="I can give you some weather reports! Just tell me which city.",
    instructions="You are a helpful assistant.",
    tools=[WeatherTool()],
    model="openai/gpt-4o-mini"
)

if __name__ == "__main__":
    AgentRunner(weather_agent).repl_loop()
Running Your Agent
Using the CLI
python agents/weather.py
You should see output like:
I can give you some weather reports! Just tell me which city.
press <ctrl-d> to quit
[Weather Agent]> What does the weather look like in NYC?
The current weather in New York City is as follows:

- **Temperature:** 17.4°C
- **Feels Like:** 9.7°C
- **Wind Speed:** 7.1 km/h
- **Wind Direction:** 221°
- **Precipitation:**  0.3 mm
- **Cloud Cover:** 100%
- **Wind Gusts:** 19.8 km/h
- **Relative Humidity:** 80%
- **Visibility:** 17,900 m
- **UV Index:** 0.0

It seems to be quite cloudy, and the temperature feels cooler than the actual temperature.
[openai/gpt-4o-mini: 2 calls, tokens: 162 -> 144, 0.02 cents, time: 3.81s tc: 0.02 c, ctx: 306]
[Weather Agent]>
Using the Next.js Dashboard
Running your agents in the dashboard is a great way to visualize your agents and their interactions:
agentic dashboard start --agent-path ./agents/weather.py
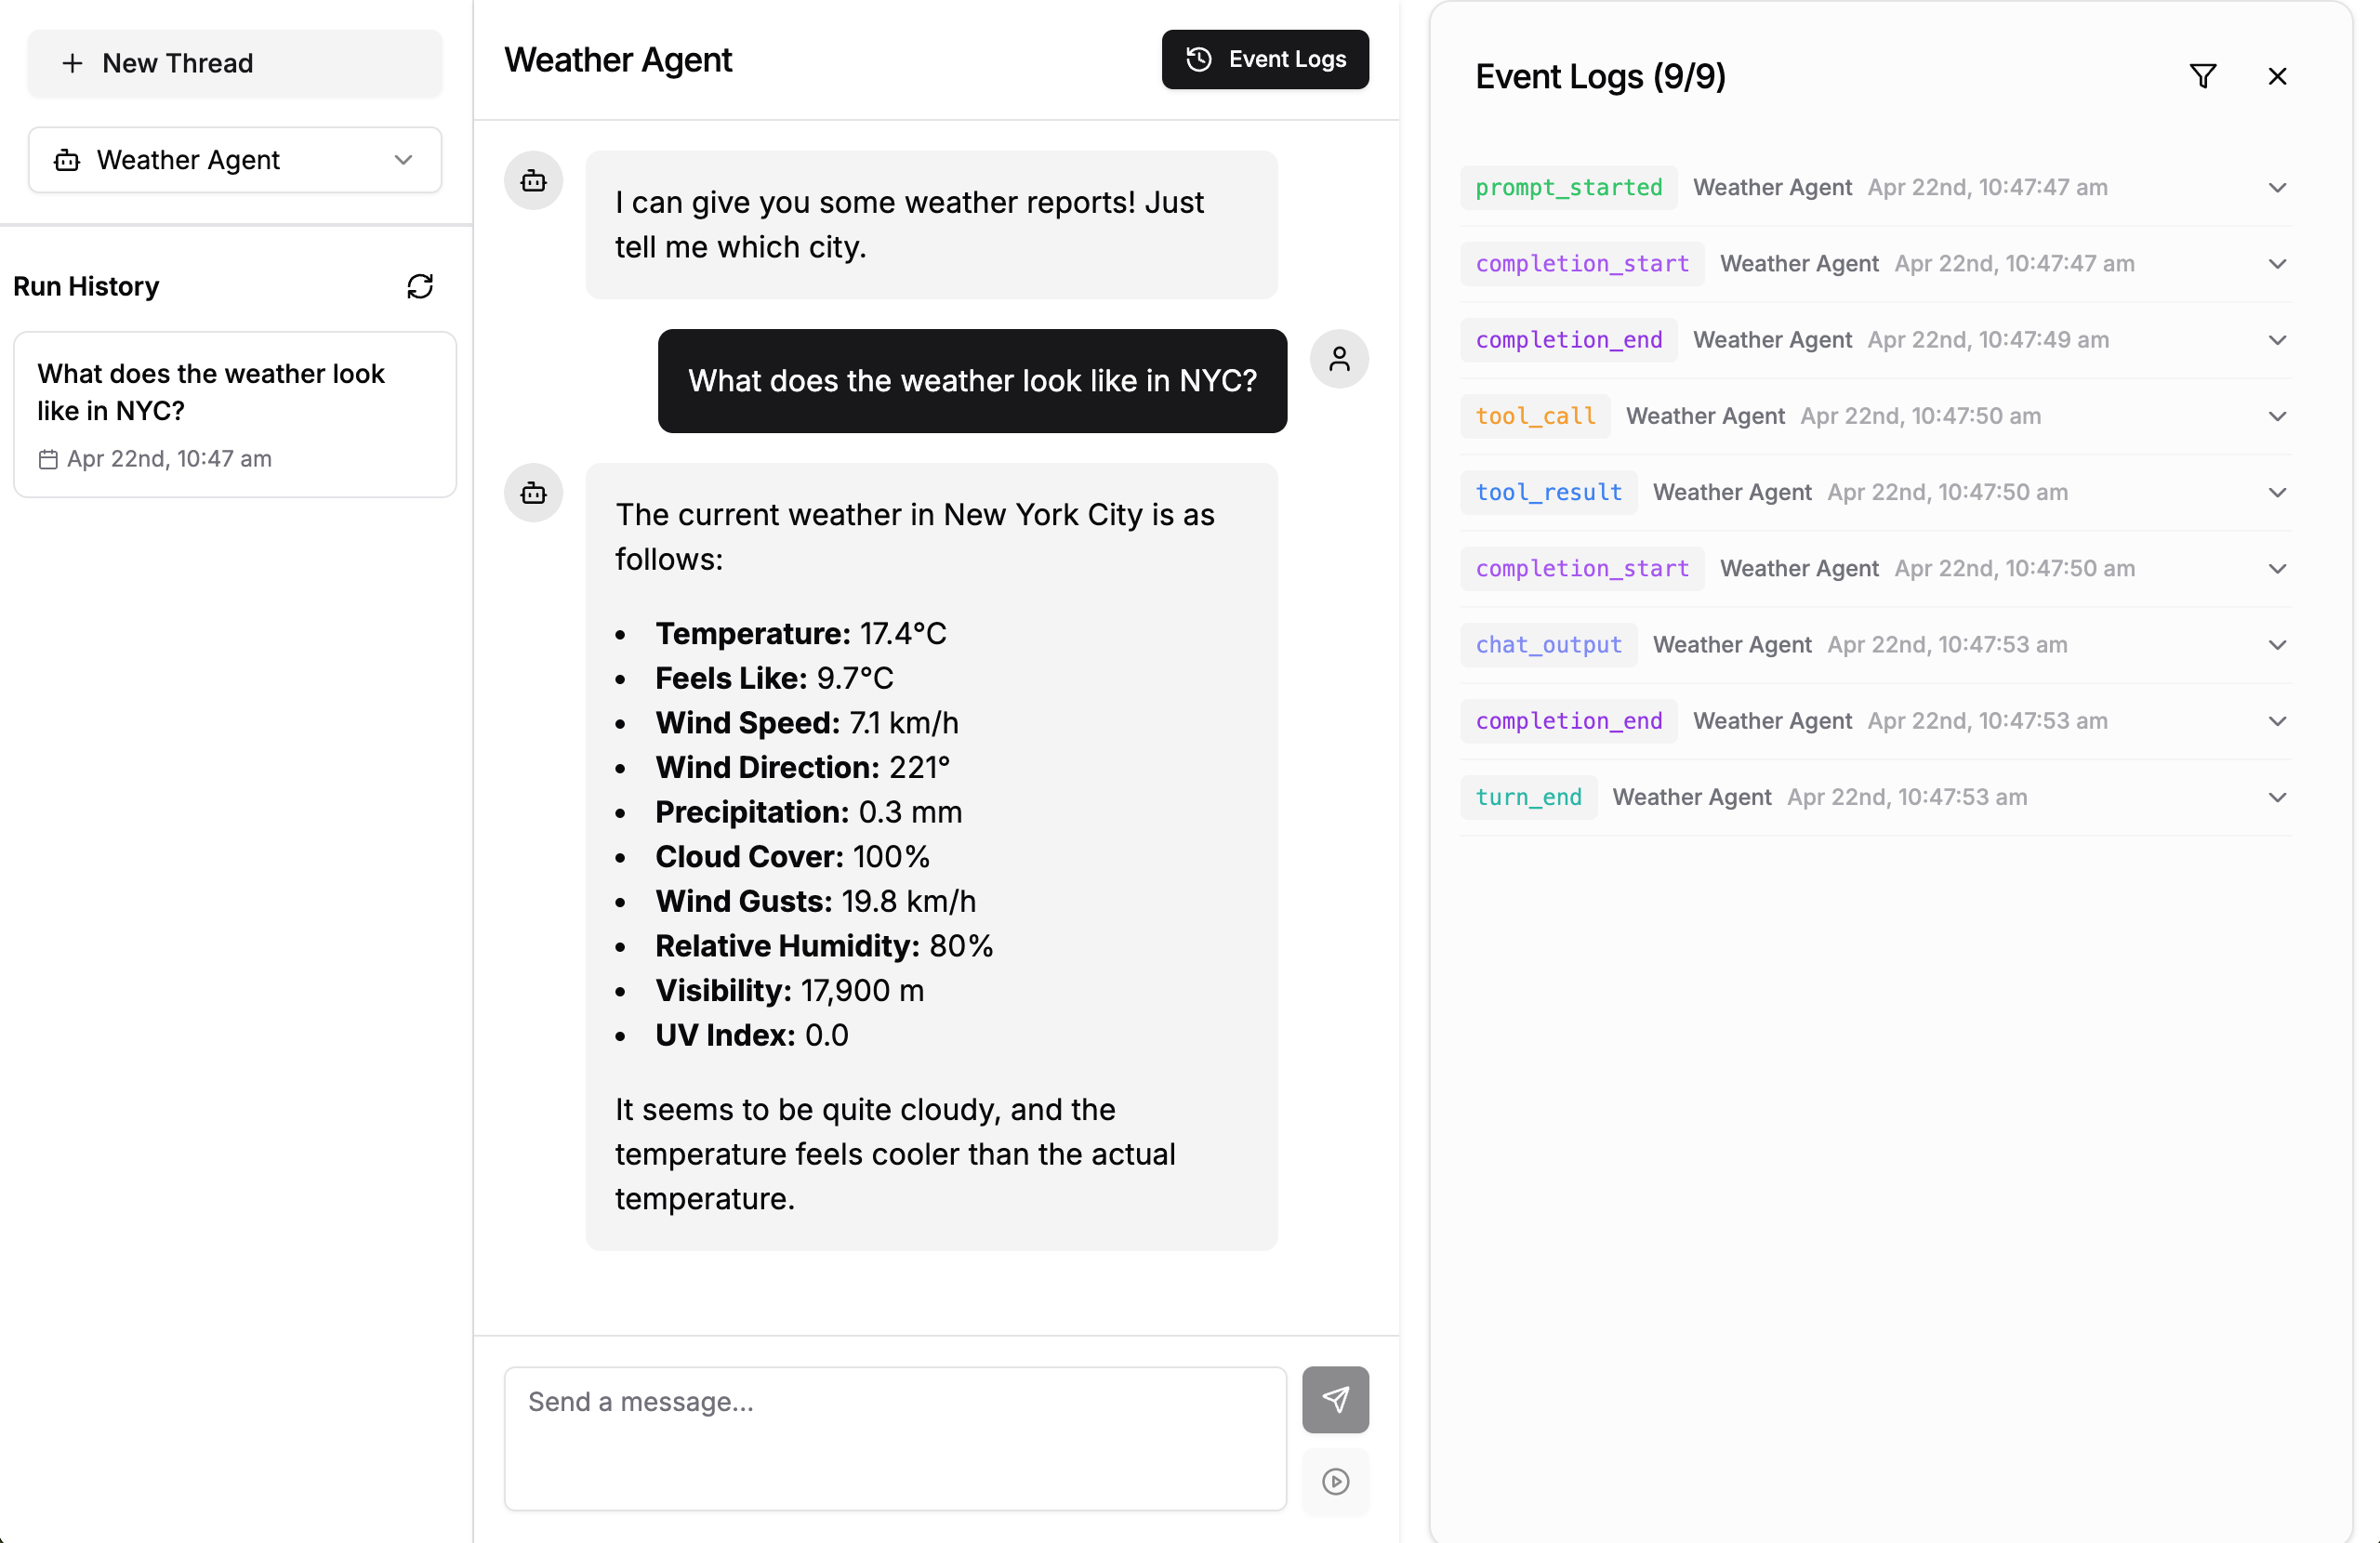
Congratulations! You've created an agent powered by the GPT-4o-mini LLM, and given it a tool which it can use to retrieve weather reports (provided by Open-meteo).
Next Steps
- Learn more about Agent Concepts
- Learn how to create your own Tools
- Explore the Database Agent for a basic Text-to-SQL agent
- Discover how to build Agent Teams